While working on the latest project there was a requirement to build setup for web application. This was quite new and interesting for me .So I am sharing my experience through this article. This article demonstrate steps for creating a setup of a web application using Install Shield LE
Step 1: Add new Project (Setup and Deployment) in existing solution.
Assign Name and Location and click Ok
Note: If installShield is not installed in VS then click ok, it will redirect you to the website from where you can install it.
Step 2: Click on Application Information.
Specify Company and application details
Step3: Click on Installation Requirement.
Select Operating system and Application if any required for your Application.
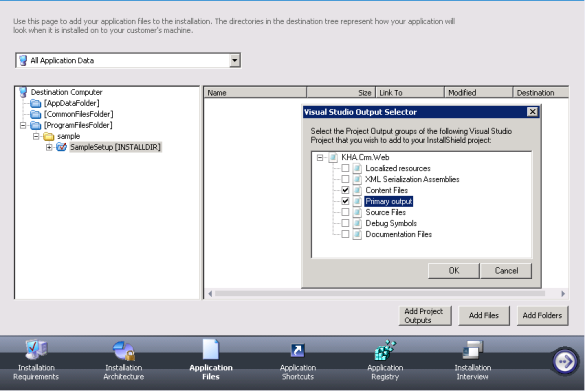
Step4: Click on Application Files
In InstallShield LE the Installation Architecture feature is not available.
Add Project output i.e. Primary output and content files.
Step5: Click On Application registry
Click Yes
Step6: Click on Installation Interview
Choose option as per your application requirement
Step 7: Create Website in IIS
Here we need to create a website with a configuration and while the setup runs it will create the website dynamically in IIS.
To create a new website:
- Click on the “Configure the Target System in Install Shield”.
- Right-click on “Websites” in Internet Information Services and assign a name, as in my case SampleSite.
- In the configuration section there is the option “Home Directory” and in that there is an option Content Source Path “Select “[IISROOTFOLDER]”(Create new folder in IISROOTFOLDER it will create in inetpub\wwwroot folder i.e. Samplesite in my case).
Step 8: Add Source of website to the setup
now we need to add the source file of the setup. Go to the “Project Assistant” tab then select Application Files”.
Here we will see that the newly created folder is named SampleSite inside “[IISROOTFOLDER]”.
- Click on the “SampleSite” folder and then click on “Add Project Outputs” and select the files as per your requirements.
Important Configuration
- To see the log file of the installer we set the option to create the MSI logs to “Yes” in:
- Organization Your Setup In Install Shield Project
- General Information >> Create MSI Logs =Yes
- Organization Your Setup In Install Shield Project
- In IIS click on APPLICATION POOLS =>DEFAULTAPPPOOL=> => Right click select ADVANCE SETTING=>ENABLE 32-BIT APPLICATION == TRUE
To Create Setup File
To create setup click build from menu and click “Build Solution”.
And you will get the setup file for the application.
Now If you see the setup file folder it will have many more additional Files but if you want to make only Single Setup File then follow the Below steps
Step 1 : Select the Project and click on Build option from VS2012 menu and then select Option Configuration Manager now select Single Image.
Now build the solution.
Written By: Namita Sethi (Dynamics CRM Team, Cipher Dynamics)


